📱Tech Tip: AirDrop like a pro (iPhone ➜ iPad) 📱➡️📲

If you want the quickest way to move photos or videos between Apple devices — without cables, emails, or blurry sends — AirDrop is hard to beat.
It works brilliantly between your own devices and with friends.
Here’s how to use it properly.
Part 1: AirDrop between your own devices (iPhone → iPad)
This is ideal if you like sorting, editing or posting photos on a bigger screen.
What you do:
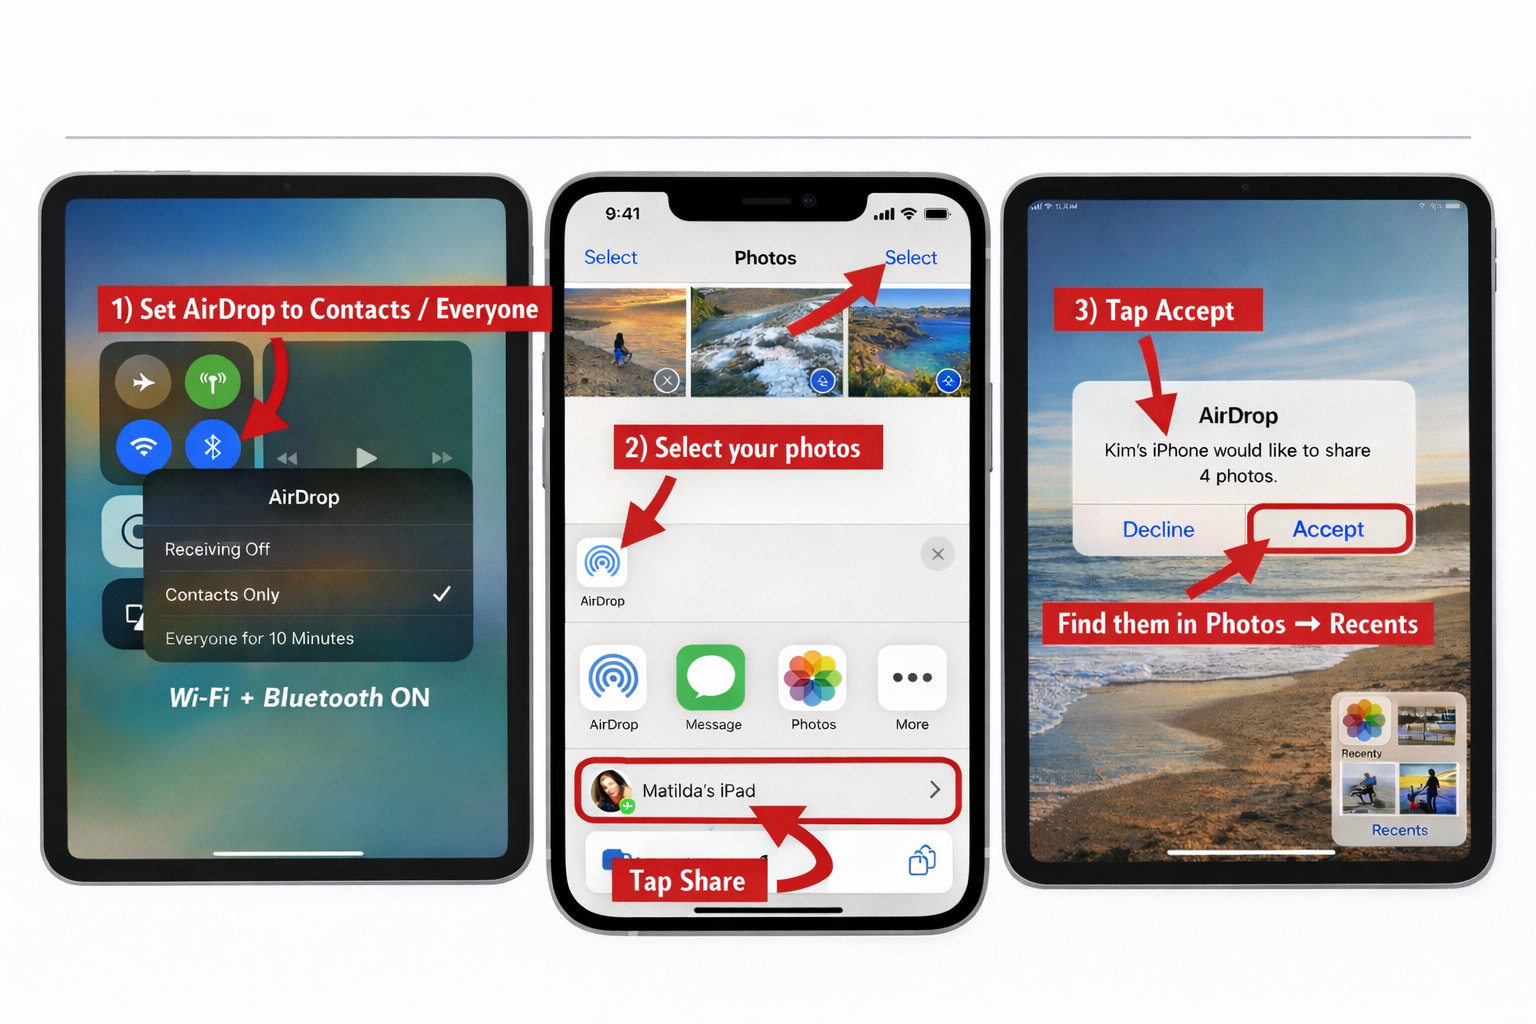
- On your iPad:
Control Centre → press & hold the Wi-Fi/Bluetooth box → AirDrop
Choose Contacts Only (or Everyone for 10 Minutes if needed) - On your iPhone:
Photos → Select → Share → AirDrop → tap your iPad - On the iPad:
Tap Accept → photos appear in Photos → Recents
That’s it — full quality, no faffing.
Part 2: AirDropping photos to friends (the right way)
This is the bit many people aren’t sure about — especially when you’re out walking, travelling, or sat with friends and want to share photos there and then.
How it works
- On both phones, open Control Centre
- Press & hold the Wi-Fi/Bluetooth box
- Set AirDrop → Everyone for 10 Minutes
This temporarily lets nearby iPhones see each other.
- On your phone:
Photos → Select → Share → AirDrop - Tap your friend’s iPhone name
- They tap Accept
After 10 minutes, AirDrop automatically switches back to Contacts Only, so you’re not leaving it open.
Helpful tips if AirDrop doesn’t appear
- Make sure Personal Hotspot is OFF
- Toggle Bluetooth off/on
- Move the phones a bit closer
- Don’t worry if the name takes a second to show — that’s normal
If you found this useful, save it for later — it’s one of those little tricks that makes sharing photos much easier 😊📸


Member discussion